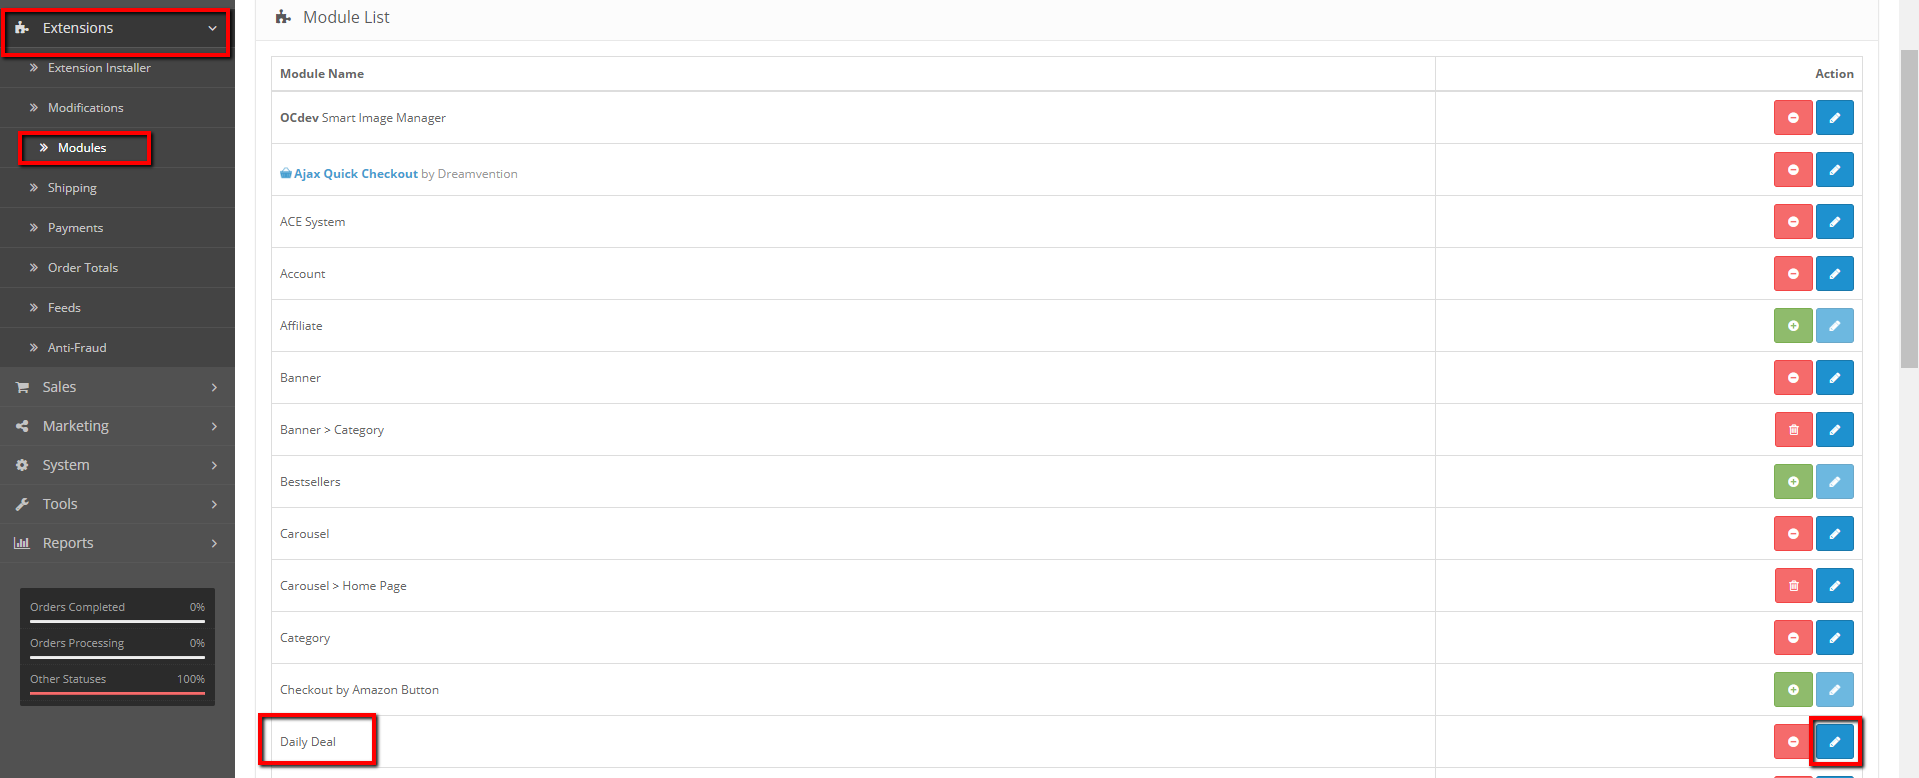
Once the module is installed, you need to log in to the admin panel and go to Extensions->Modules search for Daily Deal and click Edit.
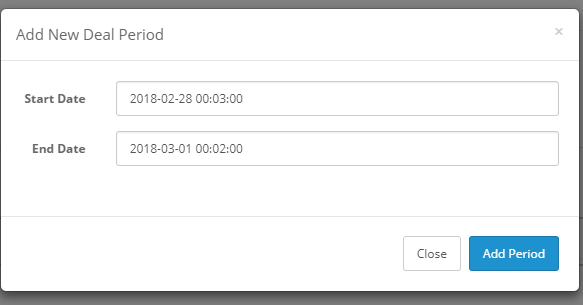
Now that you’re in the Daily Deal page, click Daily Deals tab and click Add New Deal Date to create a new deal. A pop-up will then be displayed where you’ll input the Start Date and End Date for the deal. After choosing Deal Date, hit Add Period.
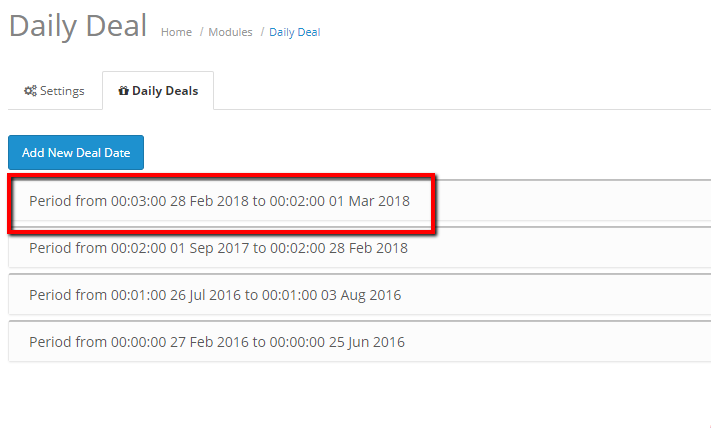
After the deal period is added you will be redirected back to the main Daily deals page, just click the Daily Deals tab again and now you can see the deal period you just added to the list. Just click the deal period you set.
Next thing to do is to fill out the necessary fields to add products to the deal. You must add items one-by-one and click Add New Product for every product.
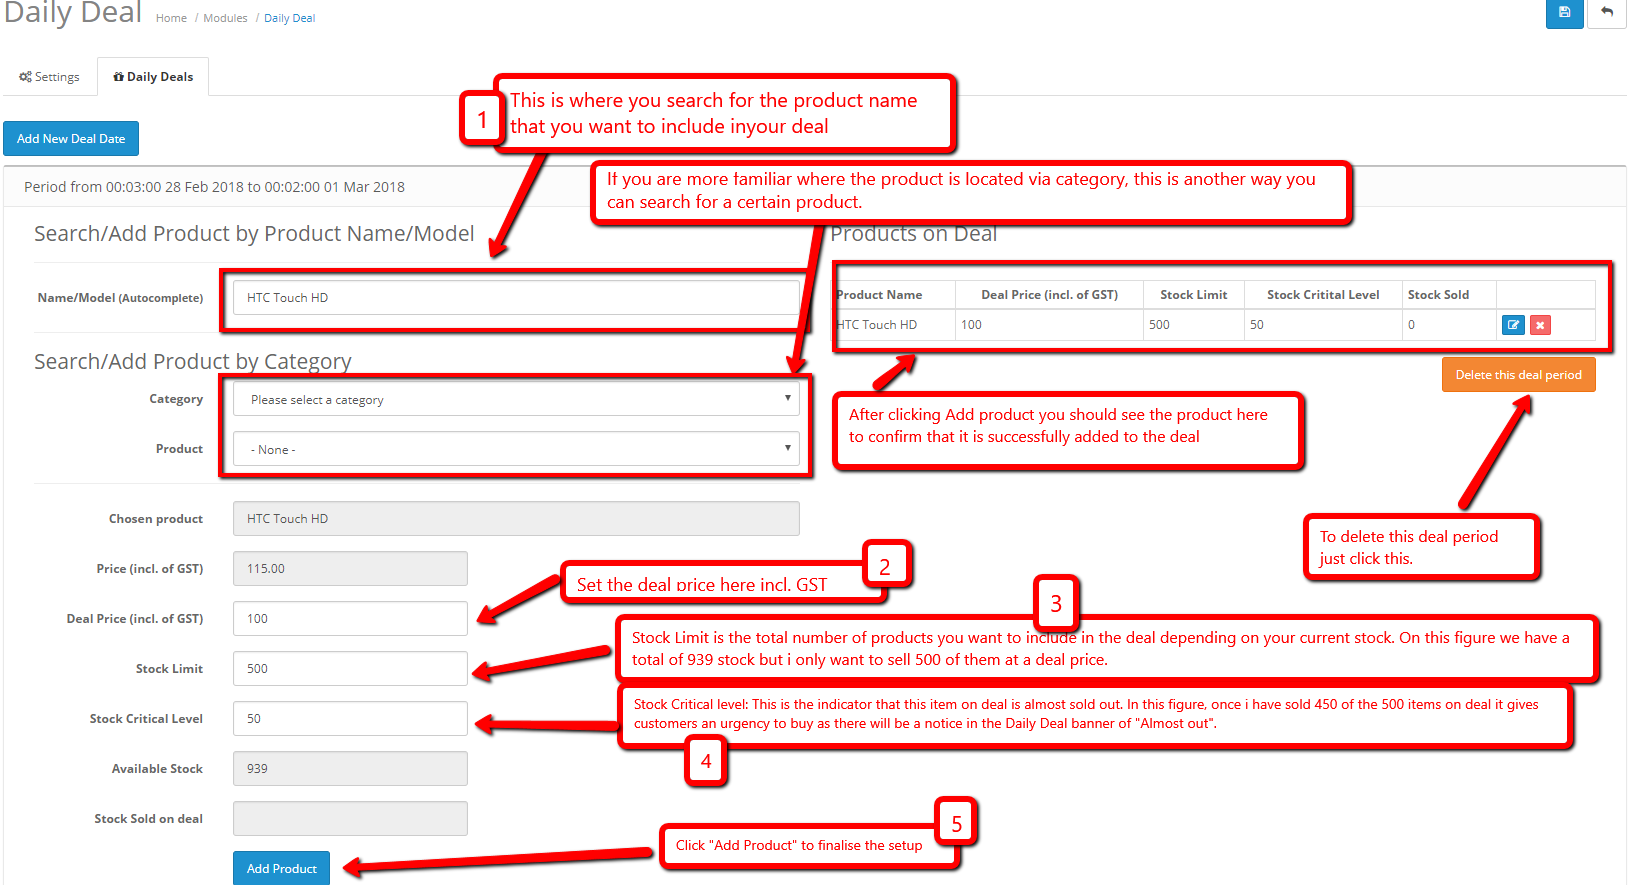
NOTE* If you want to sell all of your available stocks on the deal just match the Stock Limit to Available Stocks.
It is important to input your Mailchimp details in the Settings tab. We usually handle this matter but in case you need to change anything, here’s an illustration on where you can edit those details. (See figure below)

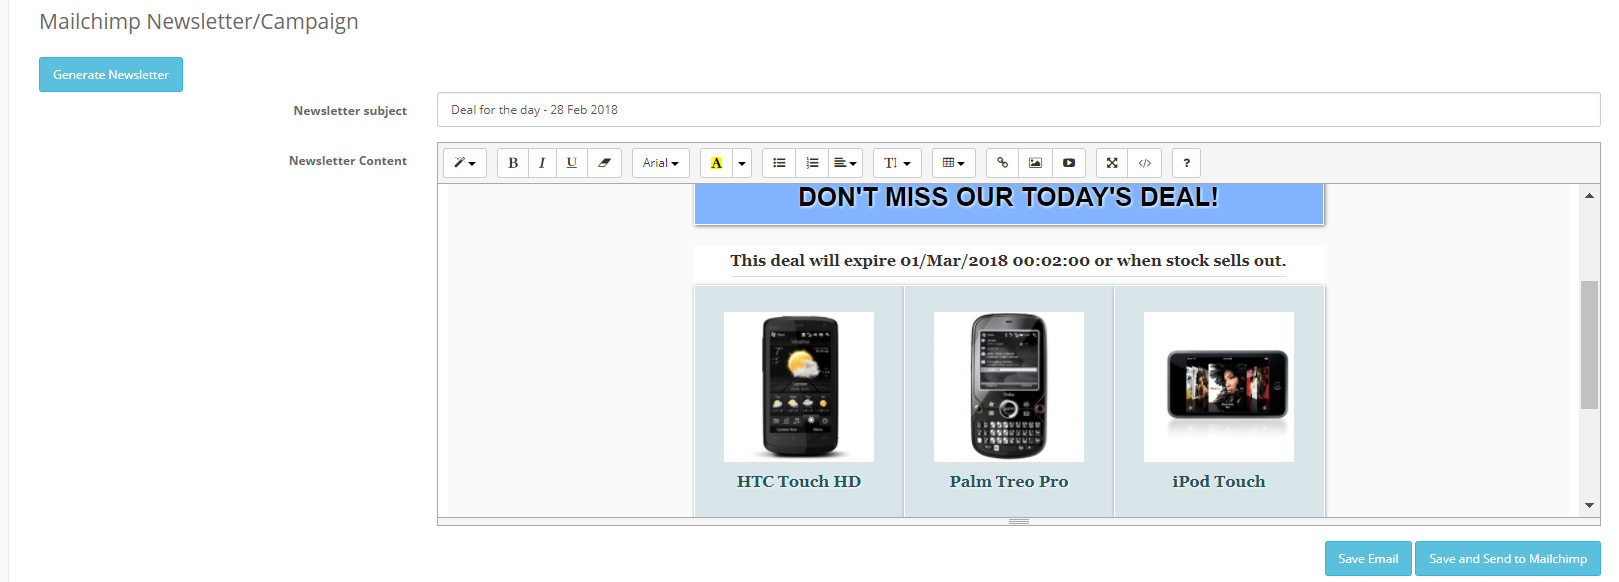
As soon as the Mailchimp details are successfully inputted, you can now Generate Newsletter for your deals inside the deal period page that you just created (See figure below). You can Save the newsletter or Save and Send to Mailchimp. Save and Send to Mailchimp will automatically make the generated newsletter as a Campaign that you can send out in your Mailchimp account.
This post is also available in: Chinese (Simplified)

