WHAT IS MULTI-VARIANT LISTINGS:
Are you selling a product which comes in multiple sizes, colours, or materials?, you can list such products as multi-variant listings (MVLs), which doesn’t involve making lots of individual listings for each variant of the same product.

With MVLs, you can group products together to create a single listing which will allow your buyers to select a specific product from a group of options.
For example, if you have a red, blue and green top in multiple sizes, you can now have just one listing, and the buyer can select which colour and size option they want from a simple drop down box. Too easy.
No more waiting for the buyer to send through the colour they want, or creating 10 listings when one will do – this will also help reduce your high-volume listing fees.
HOW TO SETUP IN OMINS
Make a virtual product. Go to products promotion view or products items view and click new (as shown in image below) and the select the type as virtual, given it an appropriate product code and save.
Fig. 1

(click image to enlarge)
Fig. 2

(click image to enlarge)
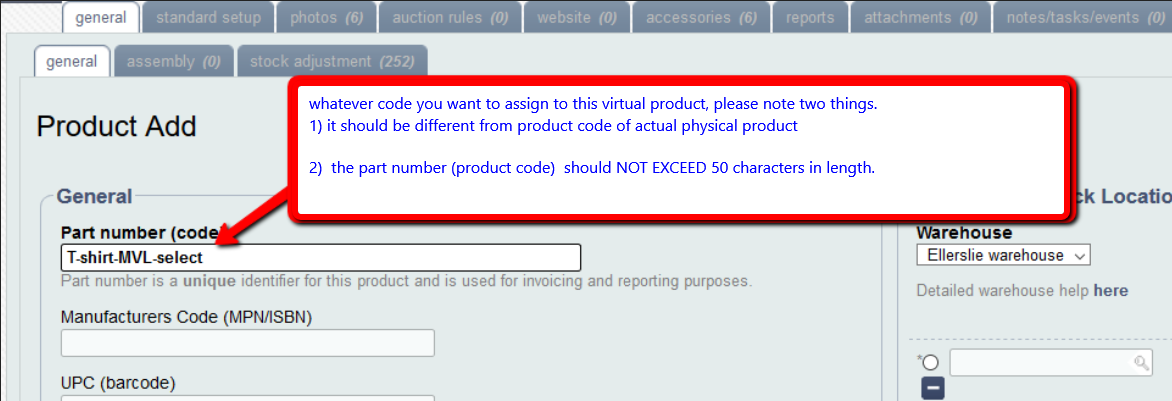
while writing product code (part number) please keep in mind following points.
1) Product code should not exceed 50 characters in length.
2) As you may already know, part number for virtual product should be different from its component products part numbers.
Fig. 3
(click image to enlarge)
Adding components to this new virtual product:
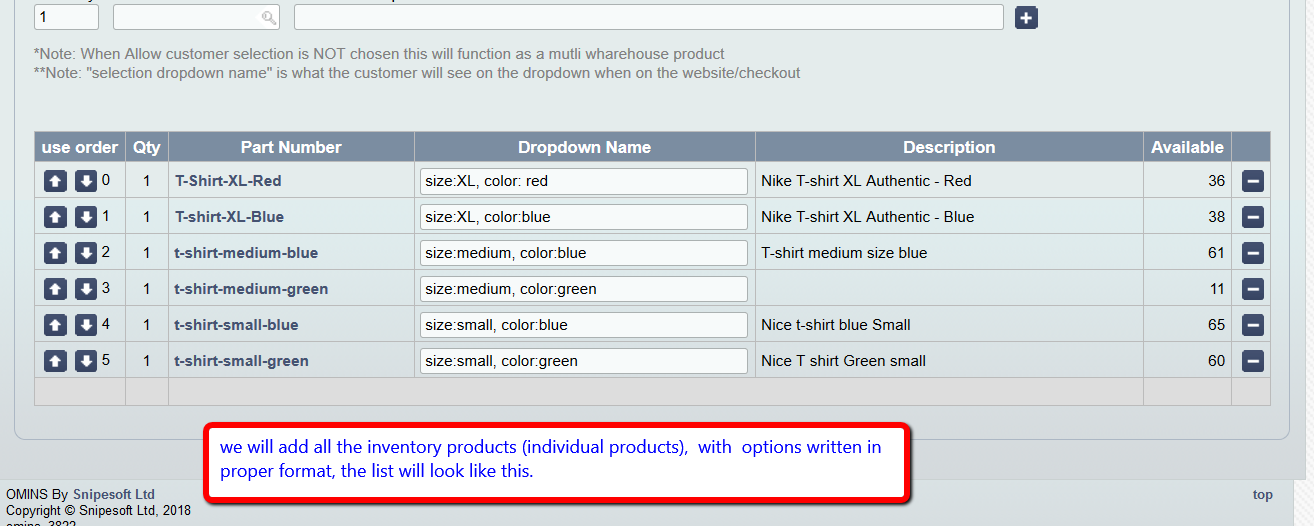
Now we are to add actual physical products (inventory type) as options to this newly created virtual product. Go to ‘assembly’ tab of virtual product (as shown in figure below) and add all of your T-shirts there. You will add components in the lower section called “selection products” or “multiwarehouse products”.
Fig. 4

(click image to enlarge)
In selection section, you will check enable the “allow customer selection” checkbox and save.
Fig. 5

(click image to enlarge)
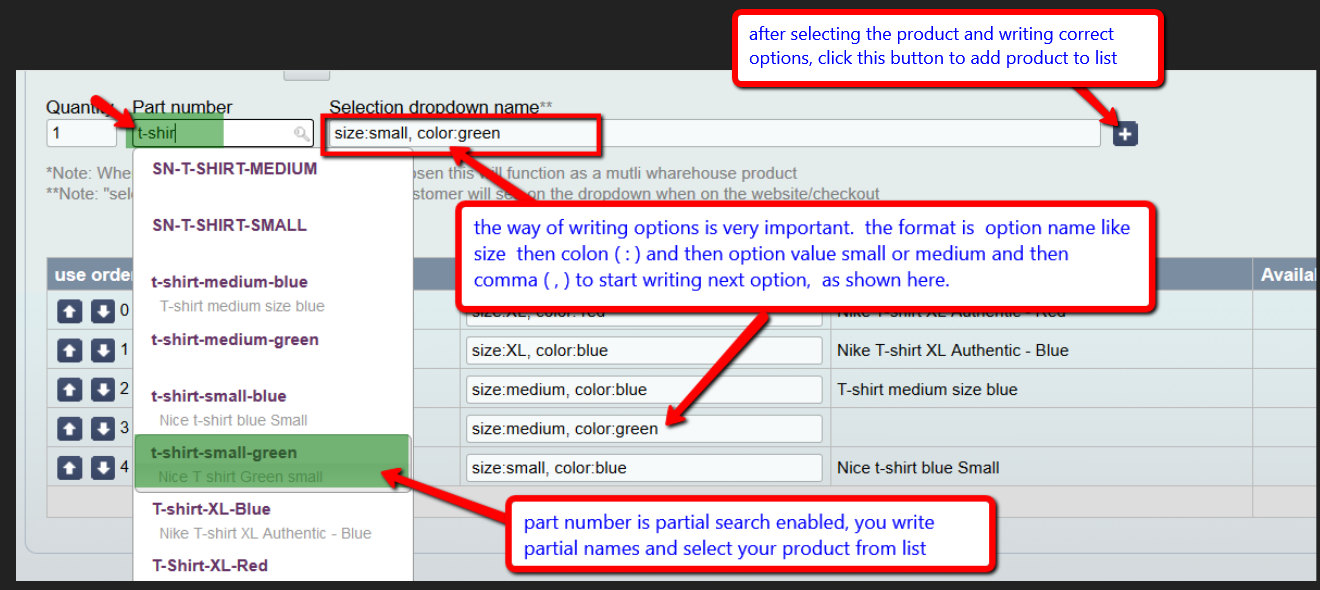
To add component (physical, inventory) products, you will write the code in ‘part name’ field. Please note, its not the part number or code of virtual product we just made, it will product code of individual product. This section is partial text enabled i.e. it suggests the products when you start typing the code (like in figure below) I started writing t-shirt and all suggestions displayed and I selected my desired product. Once you have selected the product, now you will write its options in the “dropdown name” field. These options are to be displayed in your auction as dropdown menu later on.
Fig. 6
(click image to enlarge)
Writing the options correctly:
write options correctly, as shown in the figure above. example option1 name:option1 value, option2 name:option2 value and so on.
Fig. 7
(click image to enlarge)
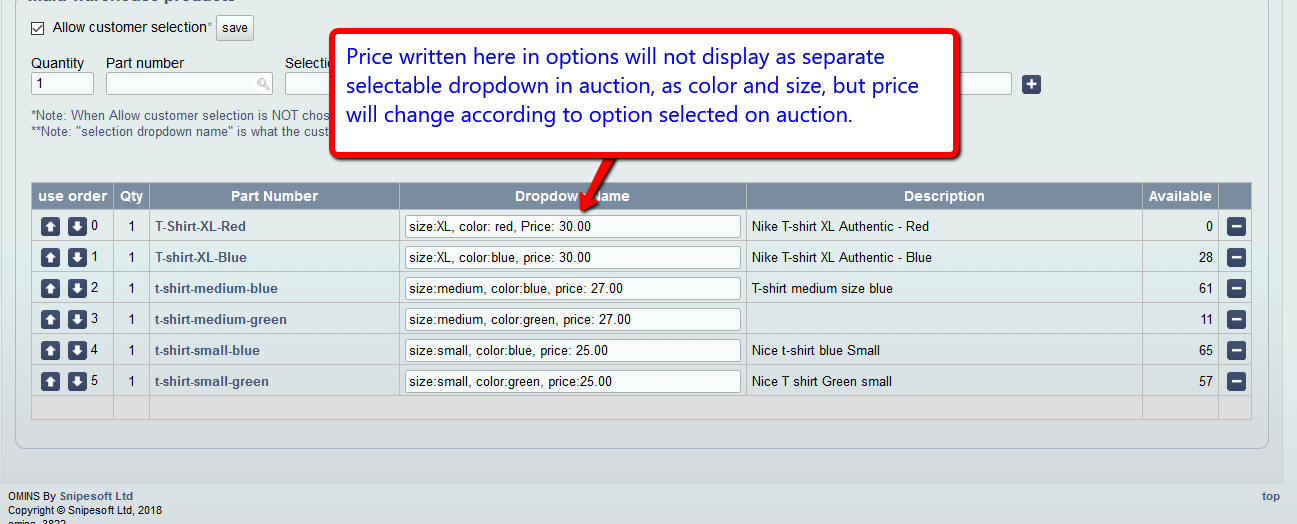
Setting different prices for different options:
If you want to display same price for all the options, set that price in auction rule as buynow price.
If you want to display different prices for different options, set the prices as option in option section in ‘assembly tab’ as shown in figure below.
If price is not written in options (in assembly tab), the buynow price of the auction rule will be used.
Fig. 8
(click image to enlarge)
if, by mistake, you duplicate some option (writing same option for two different products) or some spelling disparity, an error message will be displayed for you. (image below)
Fig. 9

(click image to enlarge)
Now you can configure the other attributes of the product like standard title and description in standard setup of virtual product, as we normally do for other products. No need to set description and title for individual component products (inventory products).
Note: You will set all product attributes in virtual products except for photos and prices. Product photos and prices will be set in individual component products (inventory type products), not in virtual product because photos will change on auction with option selection and these will be picked from individual products and likewise price, if you did not set the price in option section in assembly tab for any component, as shown above, the price will be picked from rule. So no need to upload photo for virtual product.
now your product is an mvl product and ready to be listed as an MVL auction.
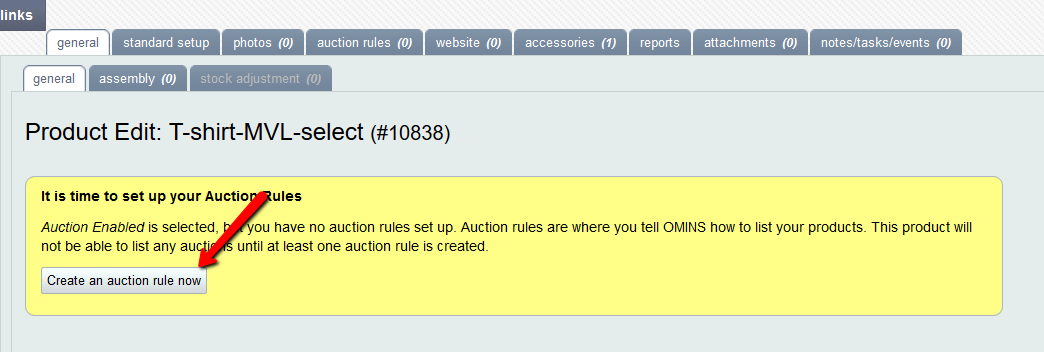
Setting up auction rules for MVL product:
All the steps in auction rule creation are same as for normal product with few changes and differences.
Fig. 10
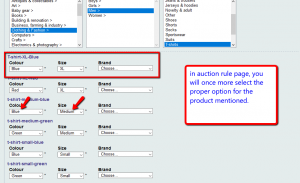
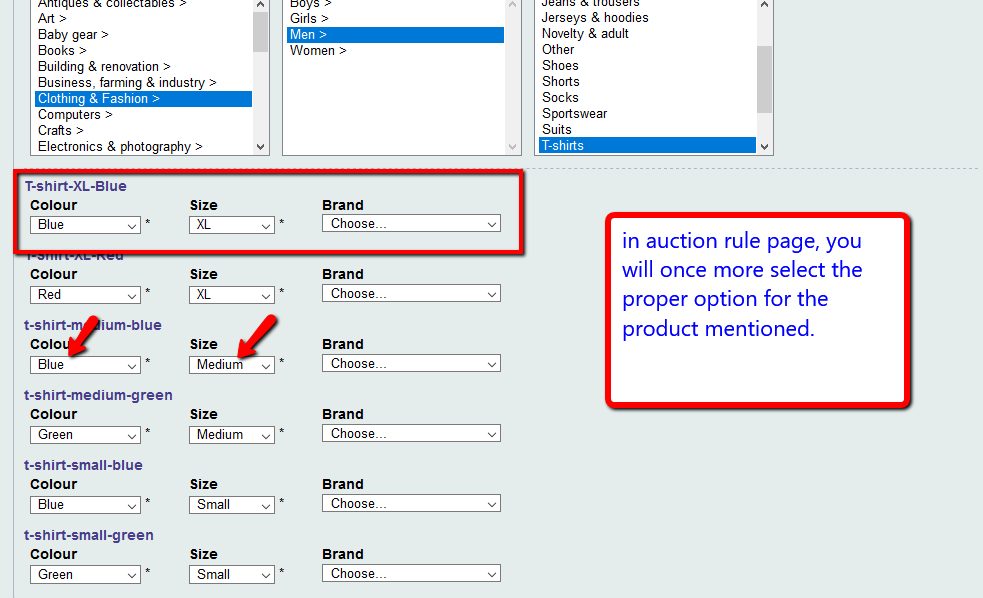
1) After selecting category, you may need to select the product options again in rule page (depending upon the category) , see image below
Fig. 11
(click image to enlarge)
2) In pricing section: You won’t be able to select standard listing and buynow options anymore for MVL auction rule because and MVL auction has to be a qty buynow auction and number of stock selected does not matter either, individual product stock will be displayed on listing.
Fig. 12

(click image to enlarge)
3) photos: As stated earlier, individual product photos will be used, if you have more than one photos for your component products, you can enable / disable photos as you want, in auction rule page.
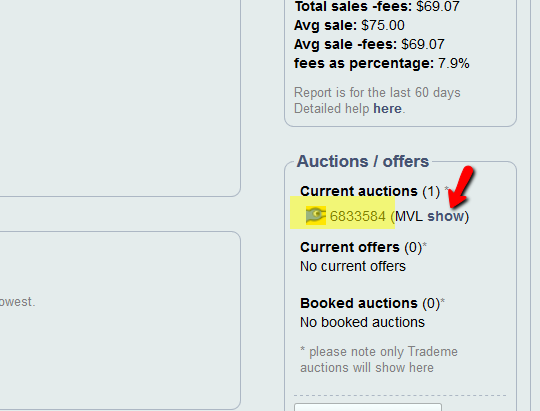
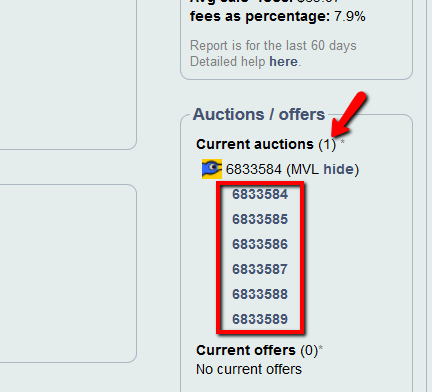
4) once rule is listed the ‘current auction’ section in rule page will show a main auction number and then below it multiple other auction number (depending upon the number of components / options and number of listings to maintain you selected in rule. (see images below) Please note: whatever number of component listings are displayed here, the main auction is 1, and other listings will not contribute to your free listing allowance. It will be considered as one listing.
Fig. 13
(click image to enlarge)
Fig. 14
(click image to enlarge)
HOW AUCTION WILL LOOK LIKE:
see following video, which shows how your auction will look like and how customer will be able to select options with price change and photo change for the product we just made. click link below for video
IMPORTANT POINTS TO KEEP IN MIND REGARDING MVL FEATURE USE IN OMINS:
- Your existing rules for virtual products may not work for mvl even after setting everything right, so you may need to copy the existing rule (for virtual products) to make a new rule so that it could work properly as MVL auction rule.
- Existing ewebstore rules for virtual products will not work unless you change the option as described above in detail, so you may need to re-check your Ewebstore rules for virtual products (selection products). You will see error message in blue color, if there is something wrong with selection segment of virtual product and you can correct accordingly. This has been described above also.
This post is also available in: Chinese (Simplified)

