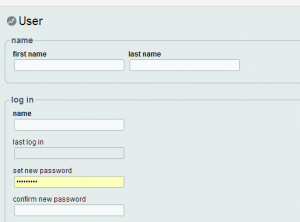
You can create new users (login IDs) in OMINS and assign different roles for each user based on what functions they need to perform and which areas of OMINS they need to access.
1. Go to settings -> users.
2. Click the new button to create a new user.
3. Enter the user’s real name in the ‘name’ section and their login name and password in the ‘log in’ section.
4. Click the save button.
Now you can assign roles to the newly created user.
To assign roles:
1. Select the role from the ‘available roles’ box on the right.
2. Click the add button.
Next assign the promo group you want to give the user access to from ‘available promo groups’.
Roles determine which areas of OMINS a user has permission to access. For example, an employee who will only be required to process orders but does not need to access the products section can be assigned the ‘invoices & customers’ role.
An individual who will only be responsible to manage products (create, delete, set prices, adjust stock, etc) and does not need to see orders/invoices can be assigned only the ‘products’ role.
Note: It is advisable to avoid assigning the ‘admin’ role to any user who does not need admin level or super-user access to your account.
This post is also available in: Chinese (Simplified)


